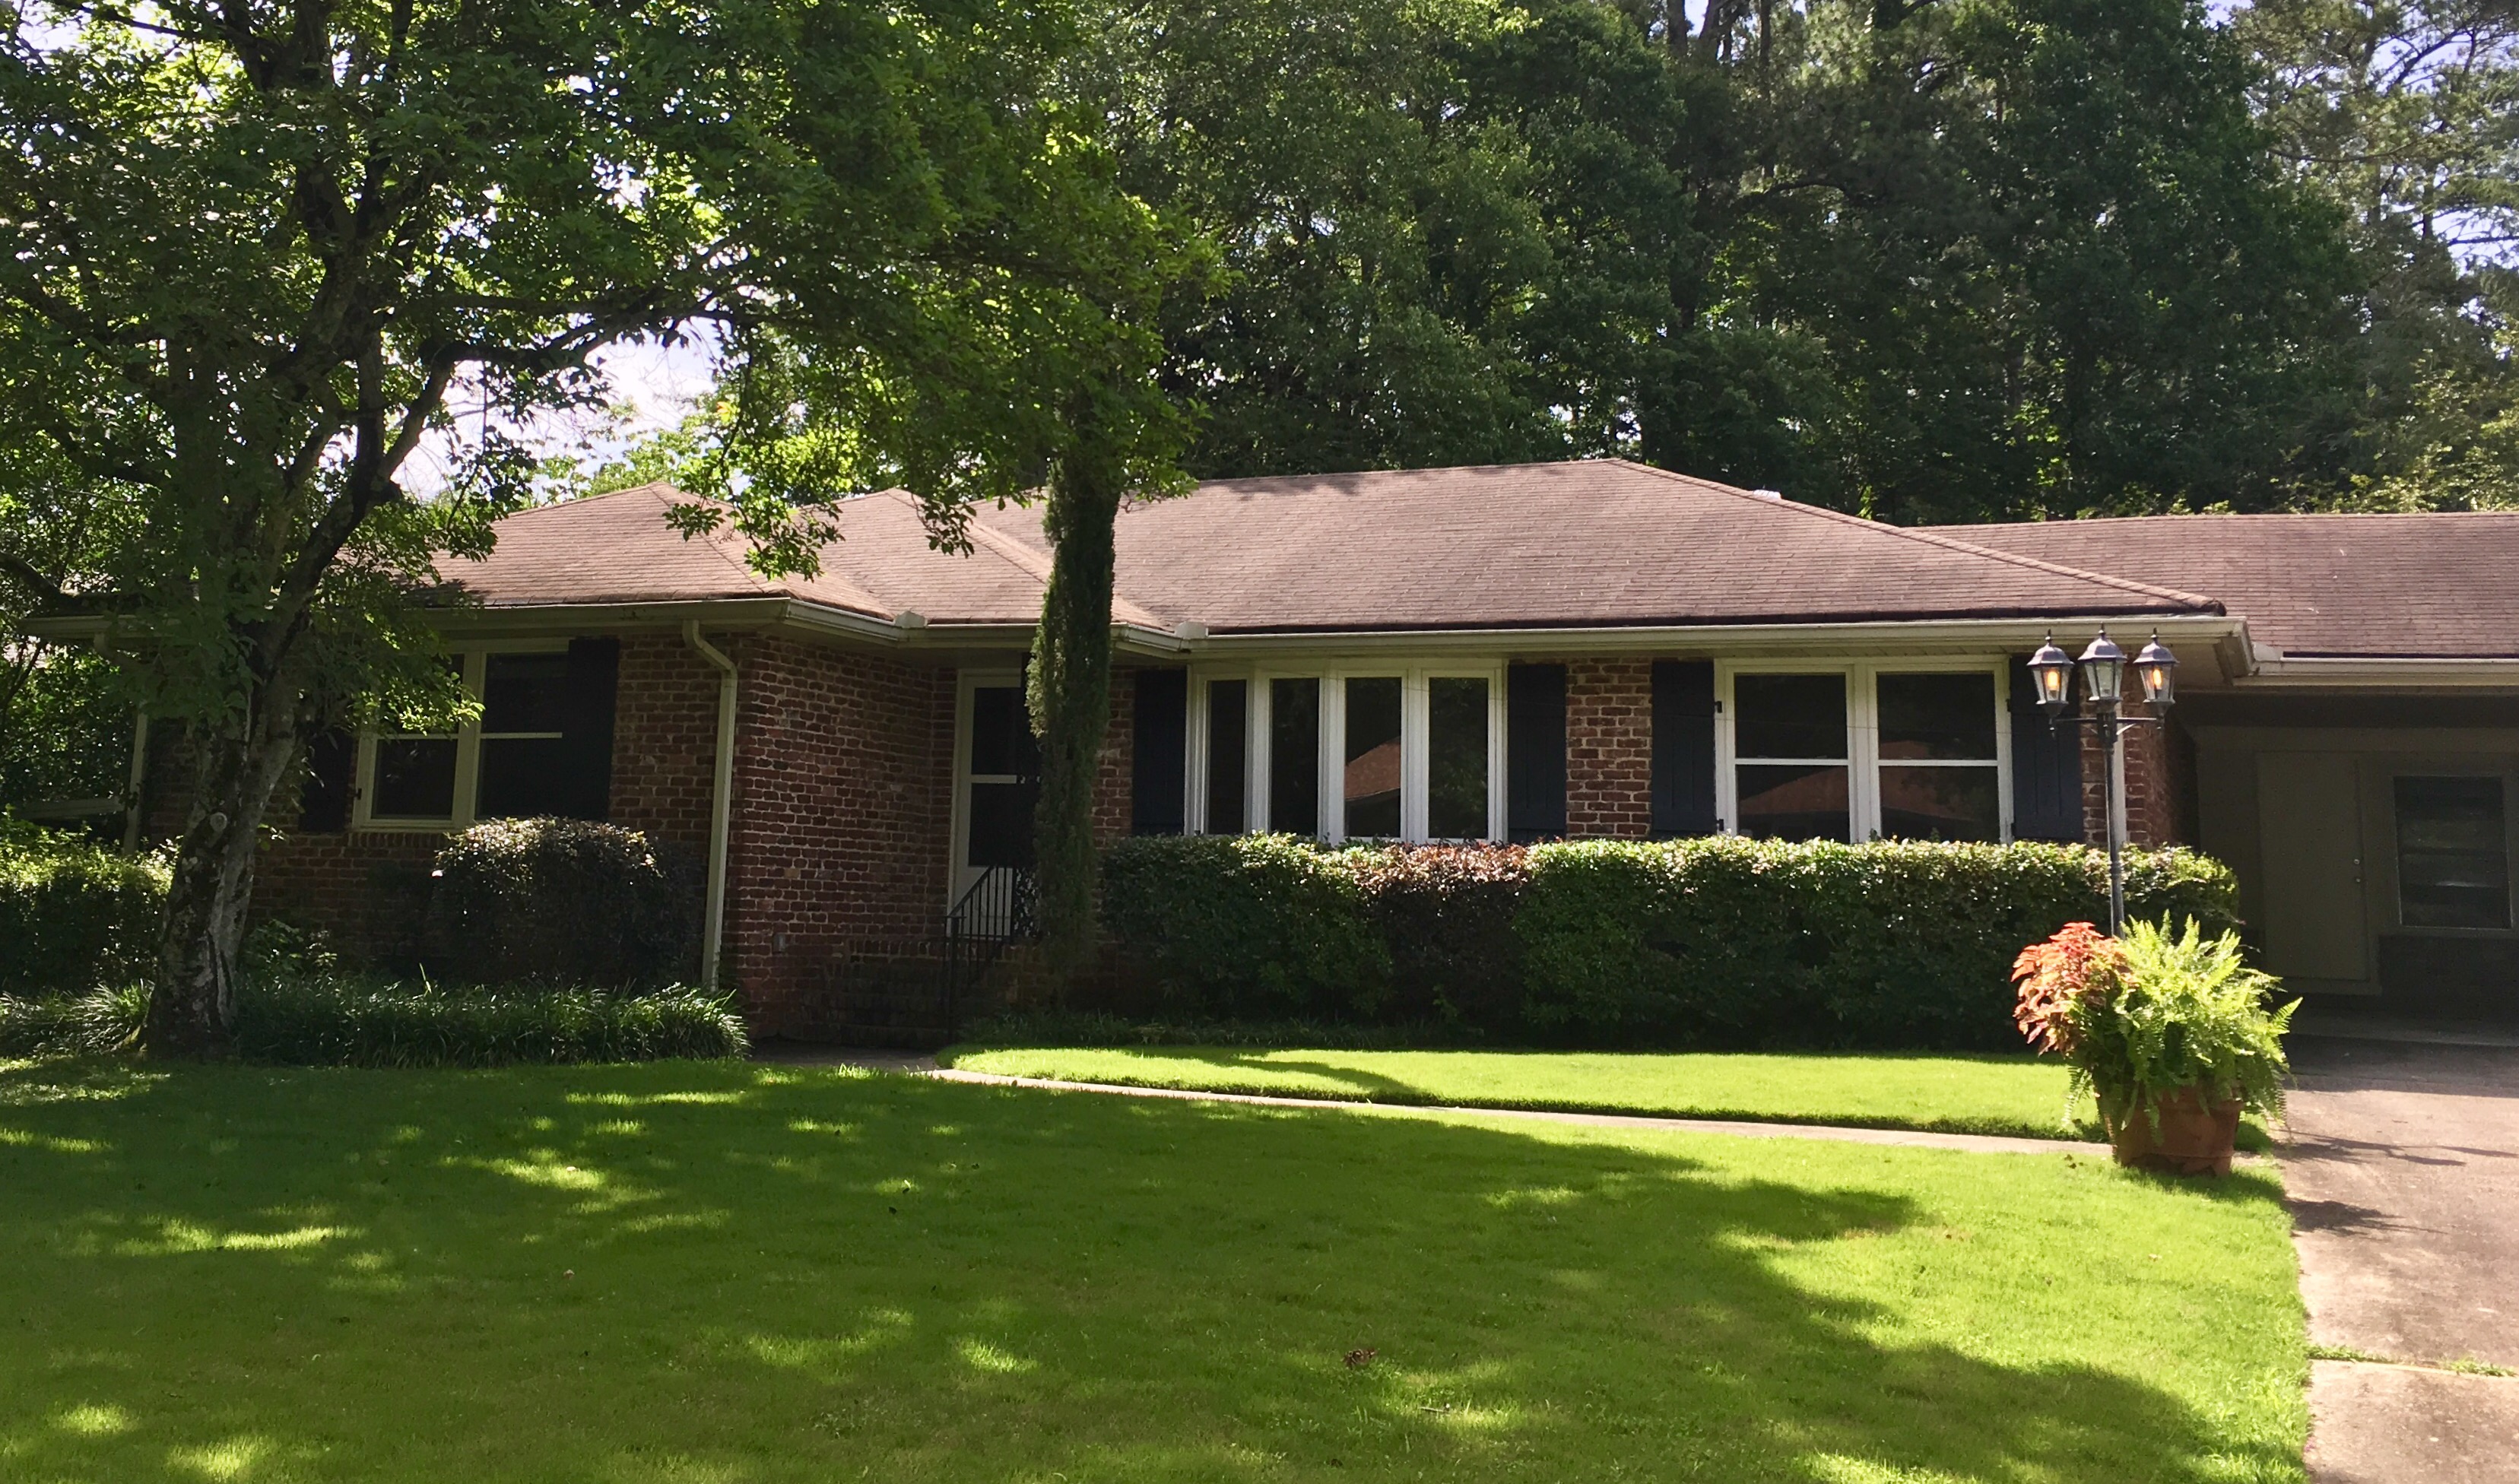
Our new house has beautiful wooden shutters but man were they in need of a face lift! I knew that I wanted to paint them but went back and forth on choosing a paint color for several days. I wanted something lighter than black that would help update the exterior look without painting the brick. I decided to go with grey but there are SO many shades of grey. It’s super overwhelming. After debating between five color swabs, i finally just decided to go for it with Benjamin Moore Chelsea Grey. I went with a semi gloss finish in their exterior paint. It was about $40 for a gallon but it was so worth it! The paint goes on like a dream and the coverage after one coat was at 90%. I highly recommend that paint! Plus, since we did the labor, spending only $40 to update the exterior of our home was a great price!
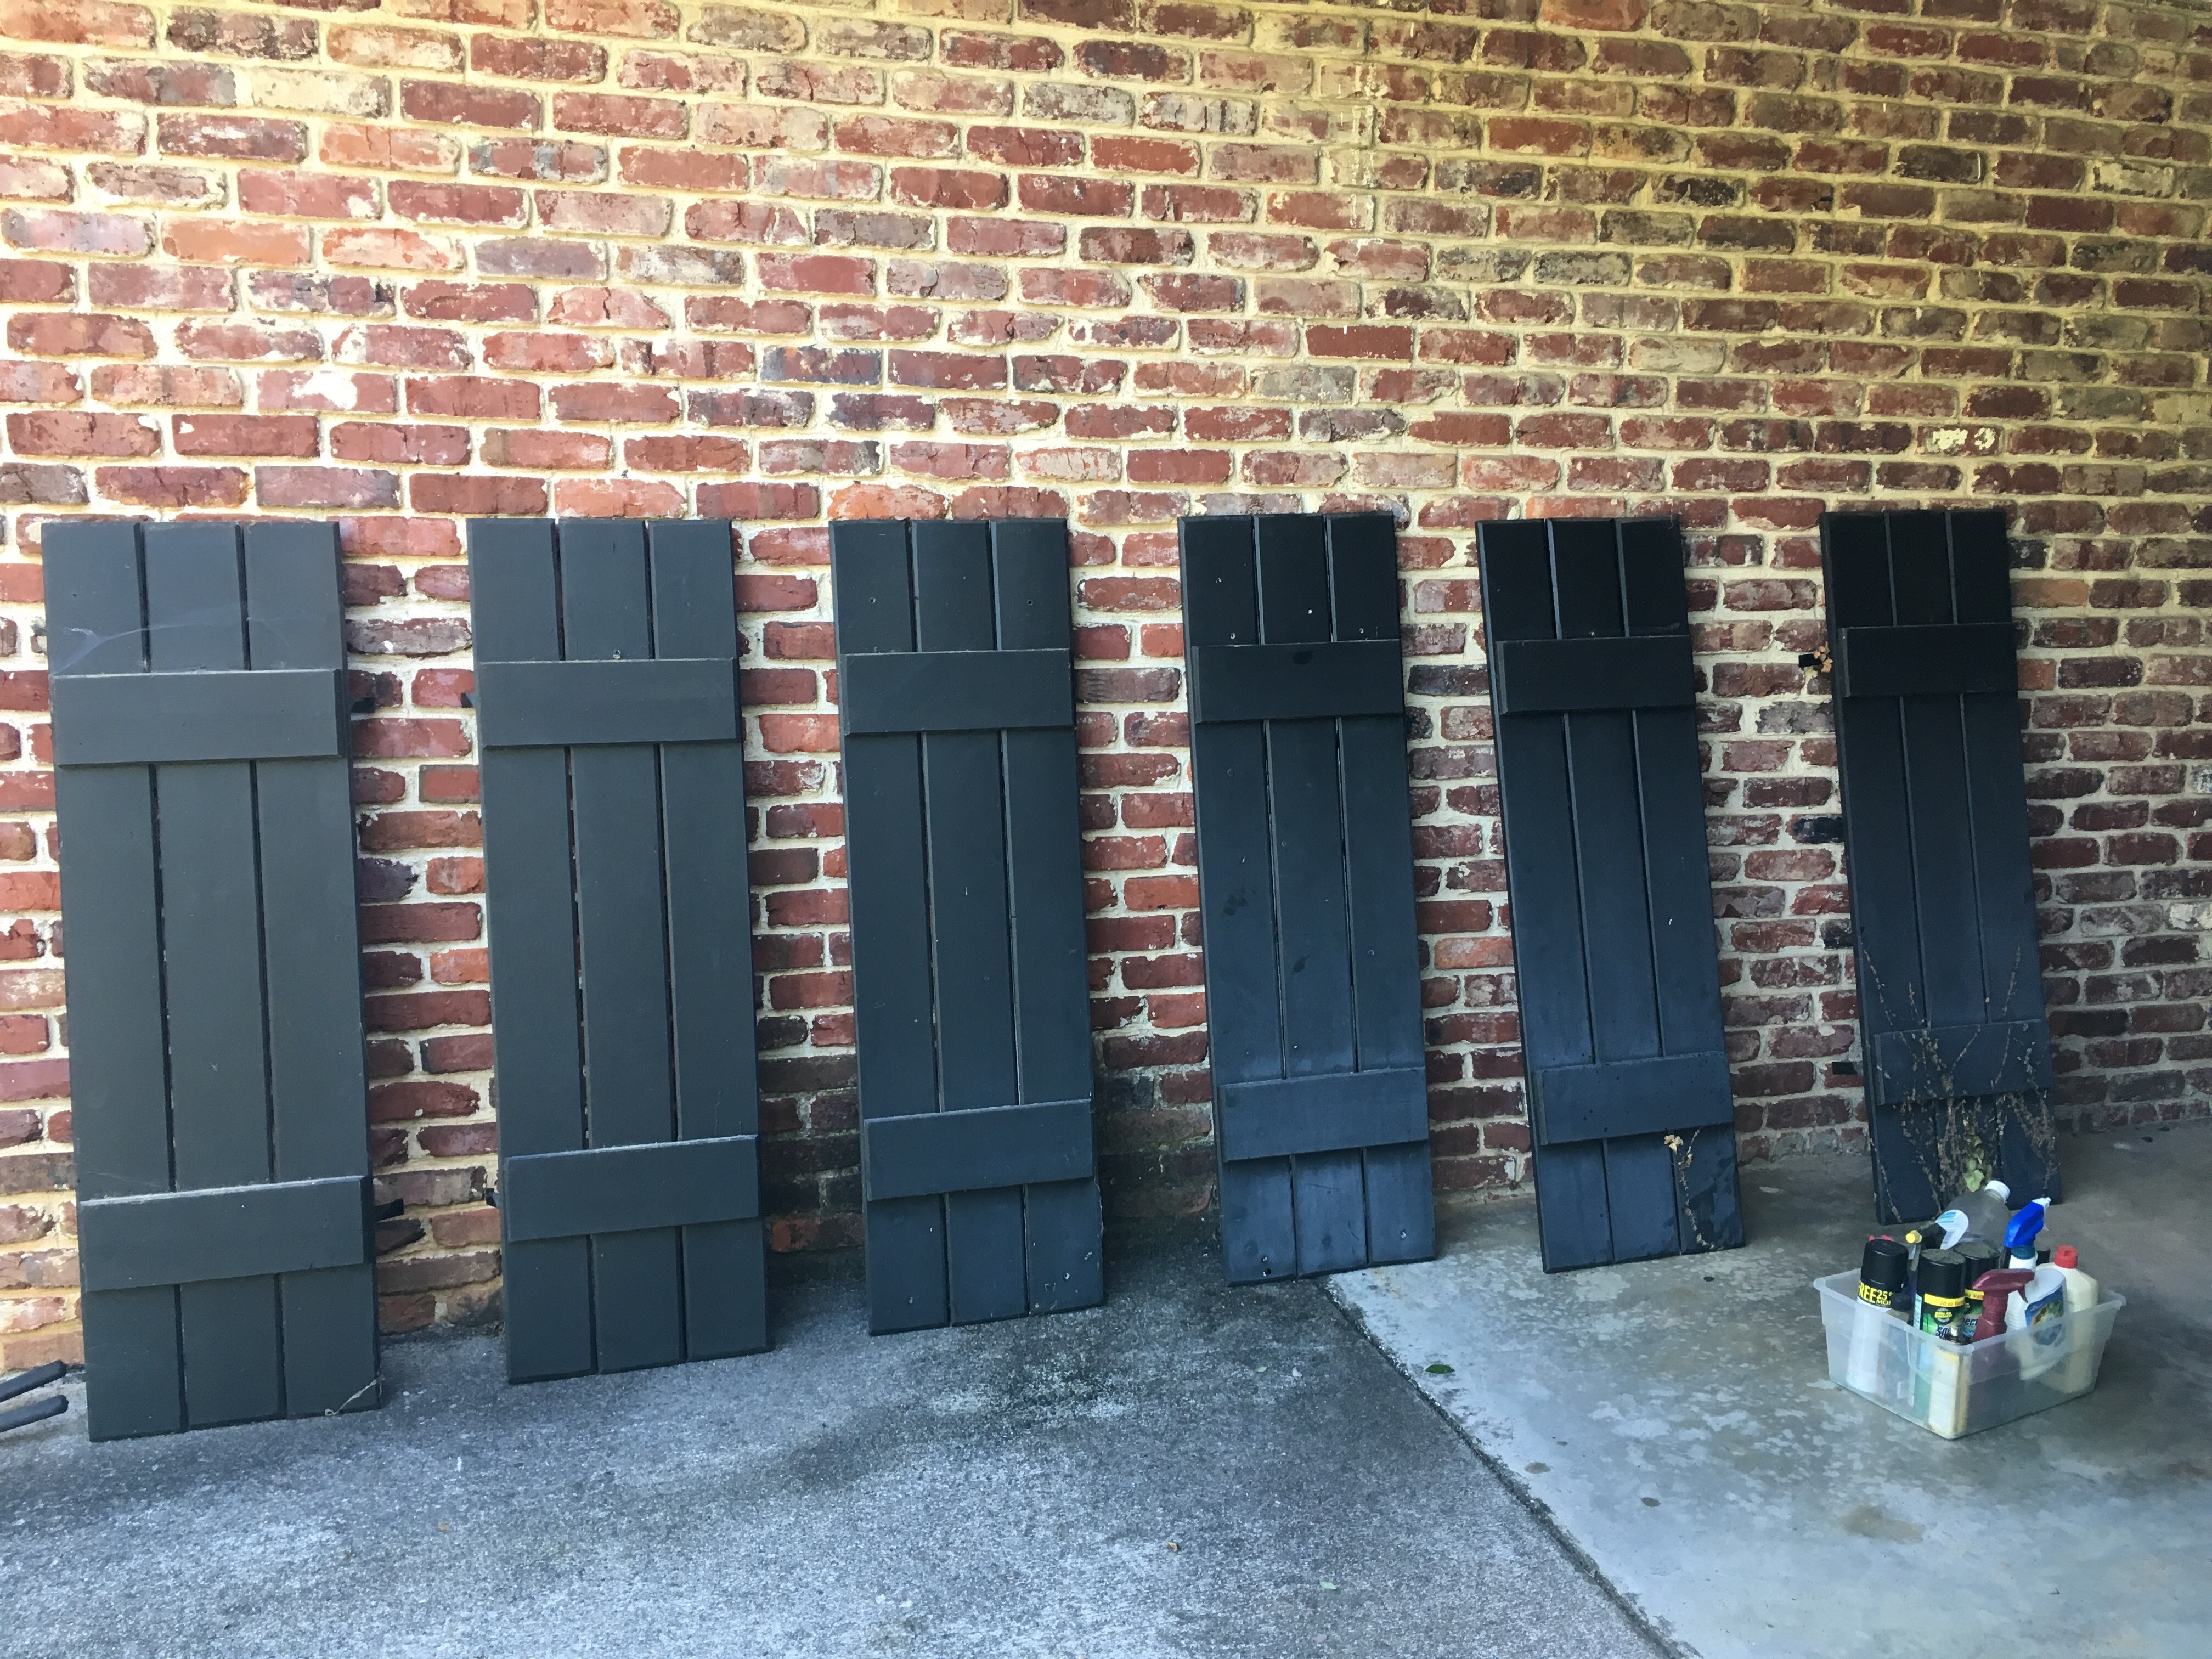 After the tedious task of choosing a color, the next step was remove the shutters from the house. Thankfully, two sets of our shutters are on working hinges and they just slide up and off. Only one set is screwed into the brick (aka slightly more difficult to remove). Peck took them all down for me. I opted to remove them to paint on the ground in the shade of the carport instead of hanging off a ladder in the sun.
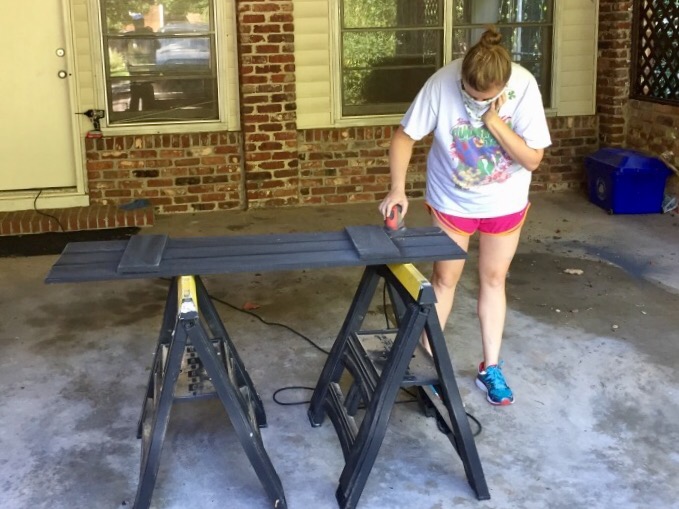
Next, I used our electric sander to smooth them out. One shutter had English ivy attached to it so I used a Sheetrock knife to help scrape those remnants off. I like to sand wood (especially old wood) before priming because I think the primer adheres much better and then the paint does too.
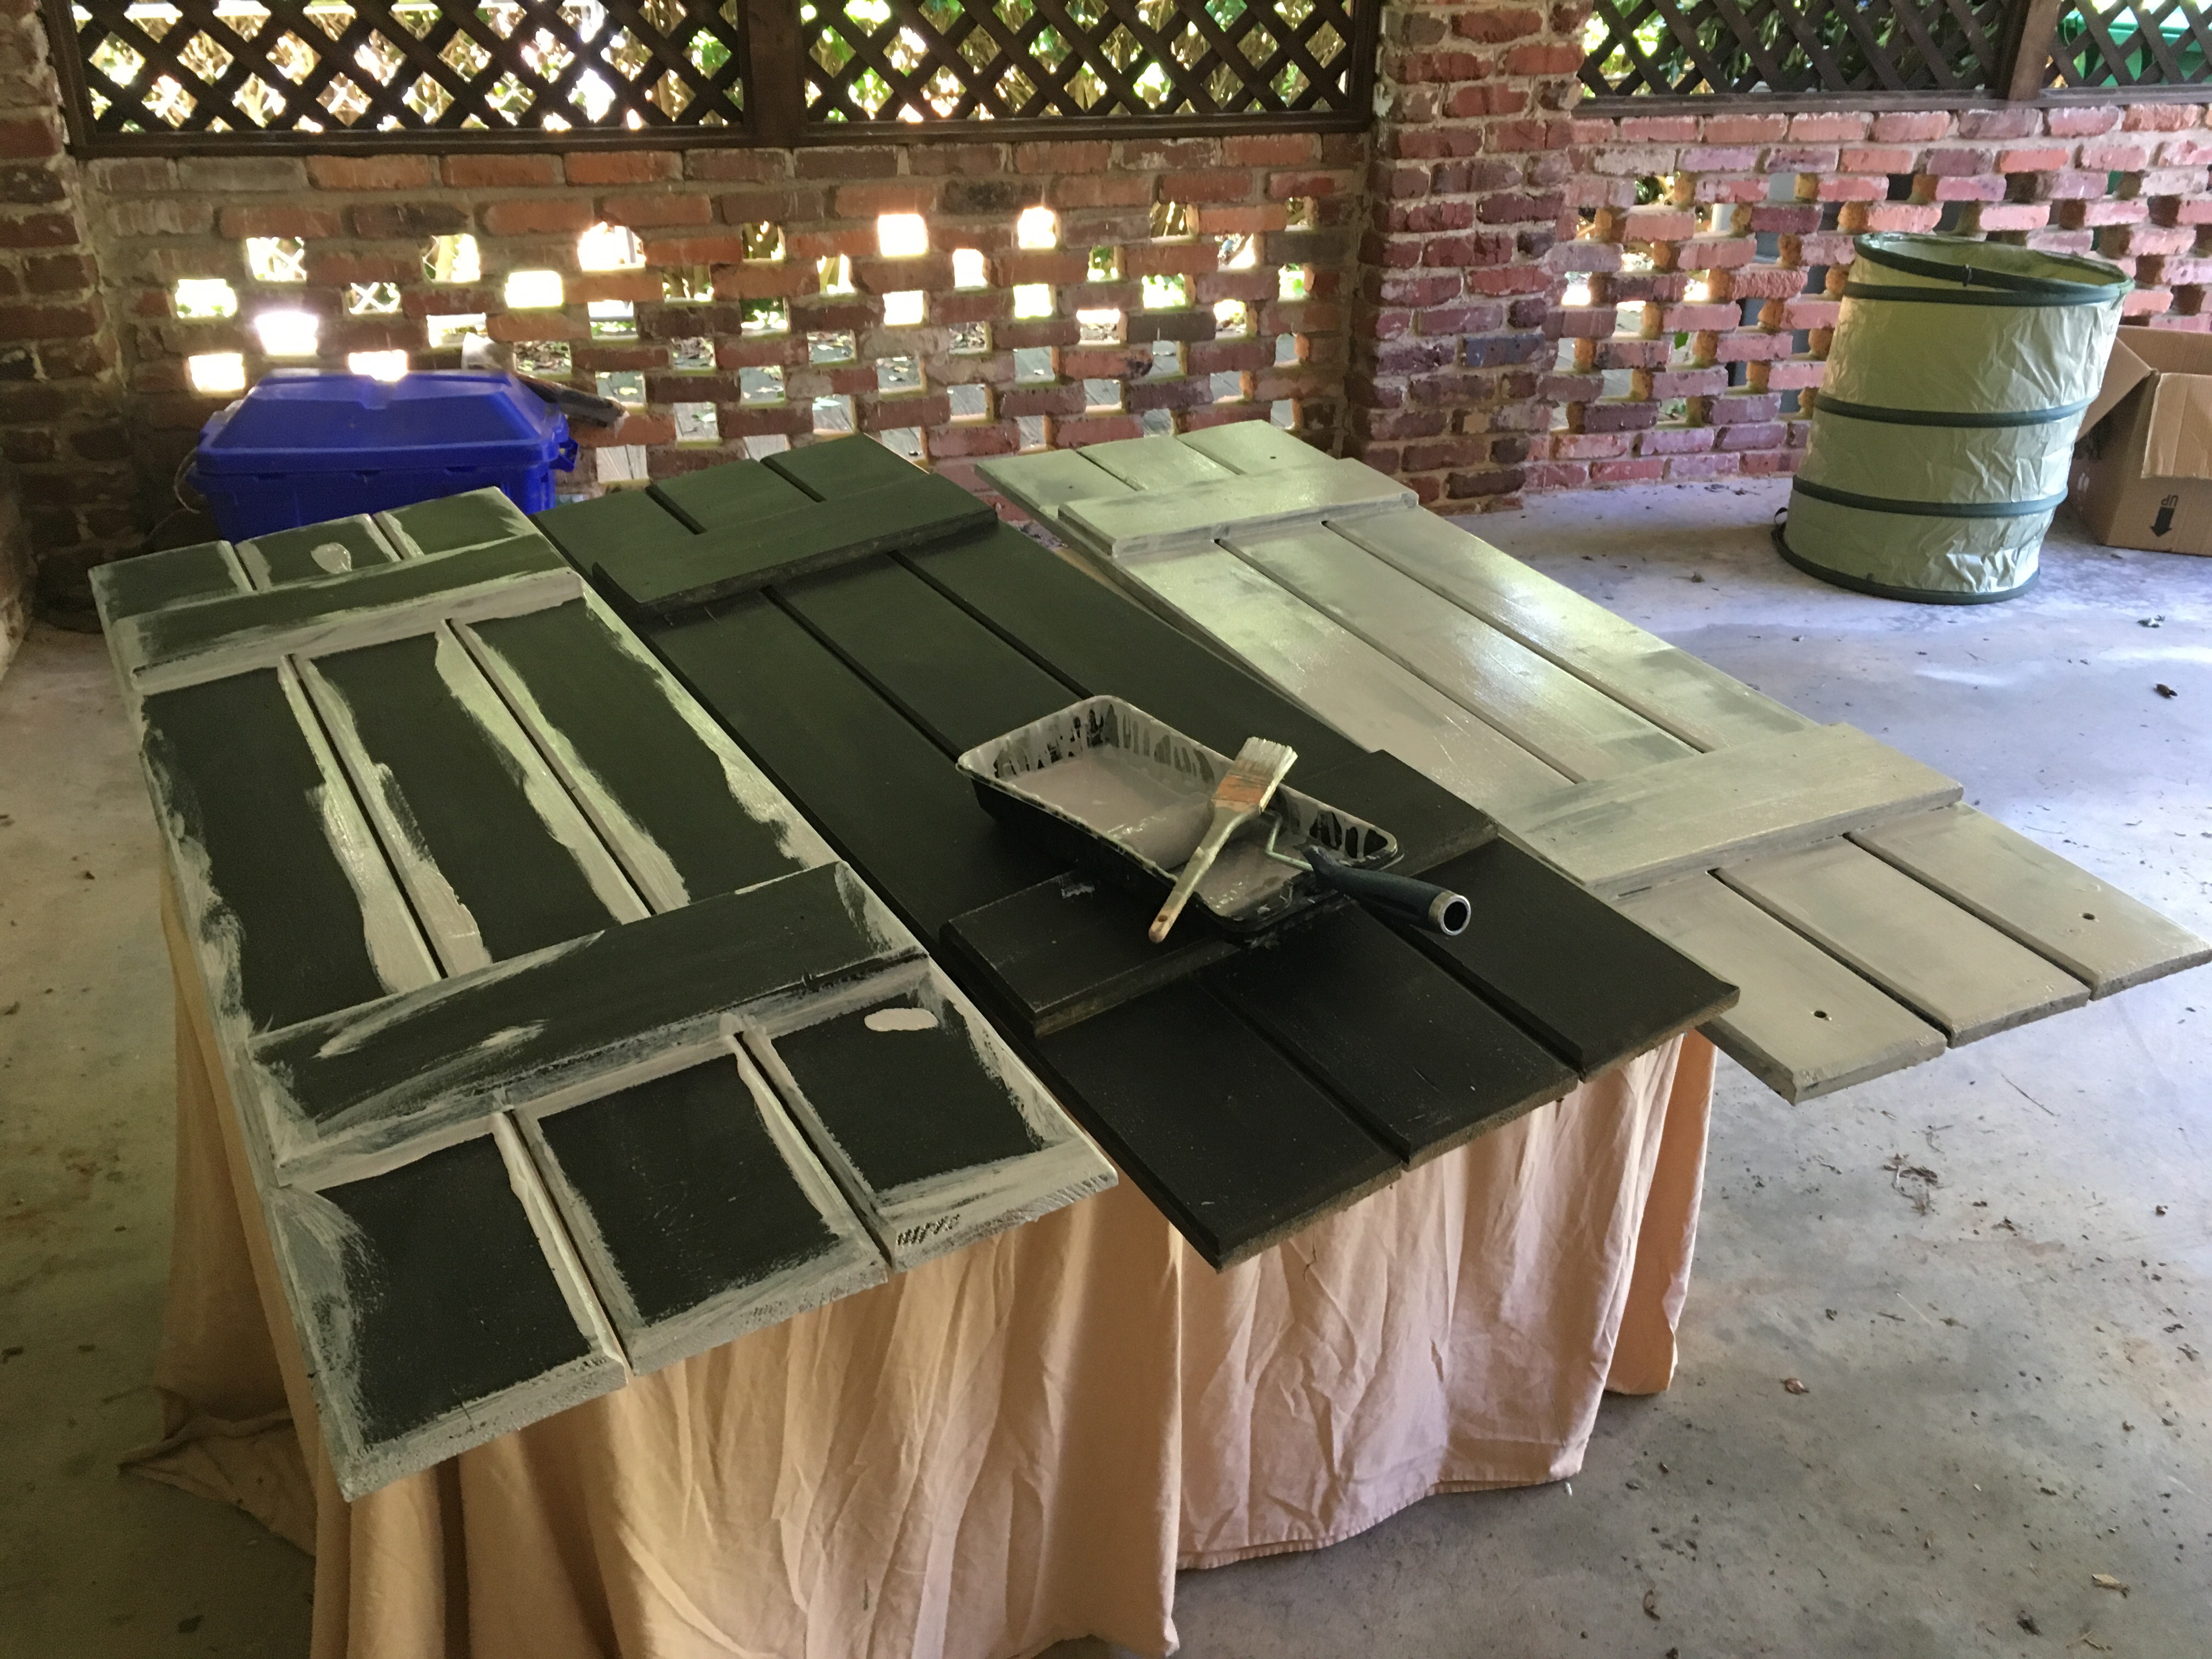 The next step was to prime them with a grey tinted kilz (leftover from kitchen cabinet painting). I’m a big believer in primer. If you do a really good first coat, it prevents extra coats of paint (which is more expensive than primer) later. I had a fan running in the carport to keep me cool and help dry the primer more quickly so it only took about 2 hours to dry completely.
Next came the paint. I was relieved to see the paint color and realize I wasn’t making a huge mistake. I let them dry over night and did a second touch up coat the next day. It was pretty easy once I got going. I found that using a brush to hit the joints in the wood first and then using the roller was a good use of time. I let them dry for about 3 hours and then they were ready to hang!
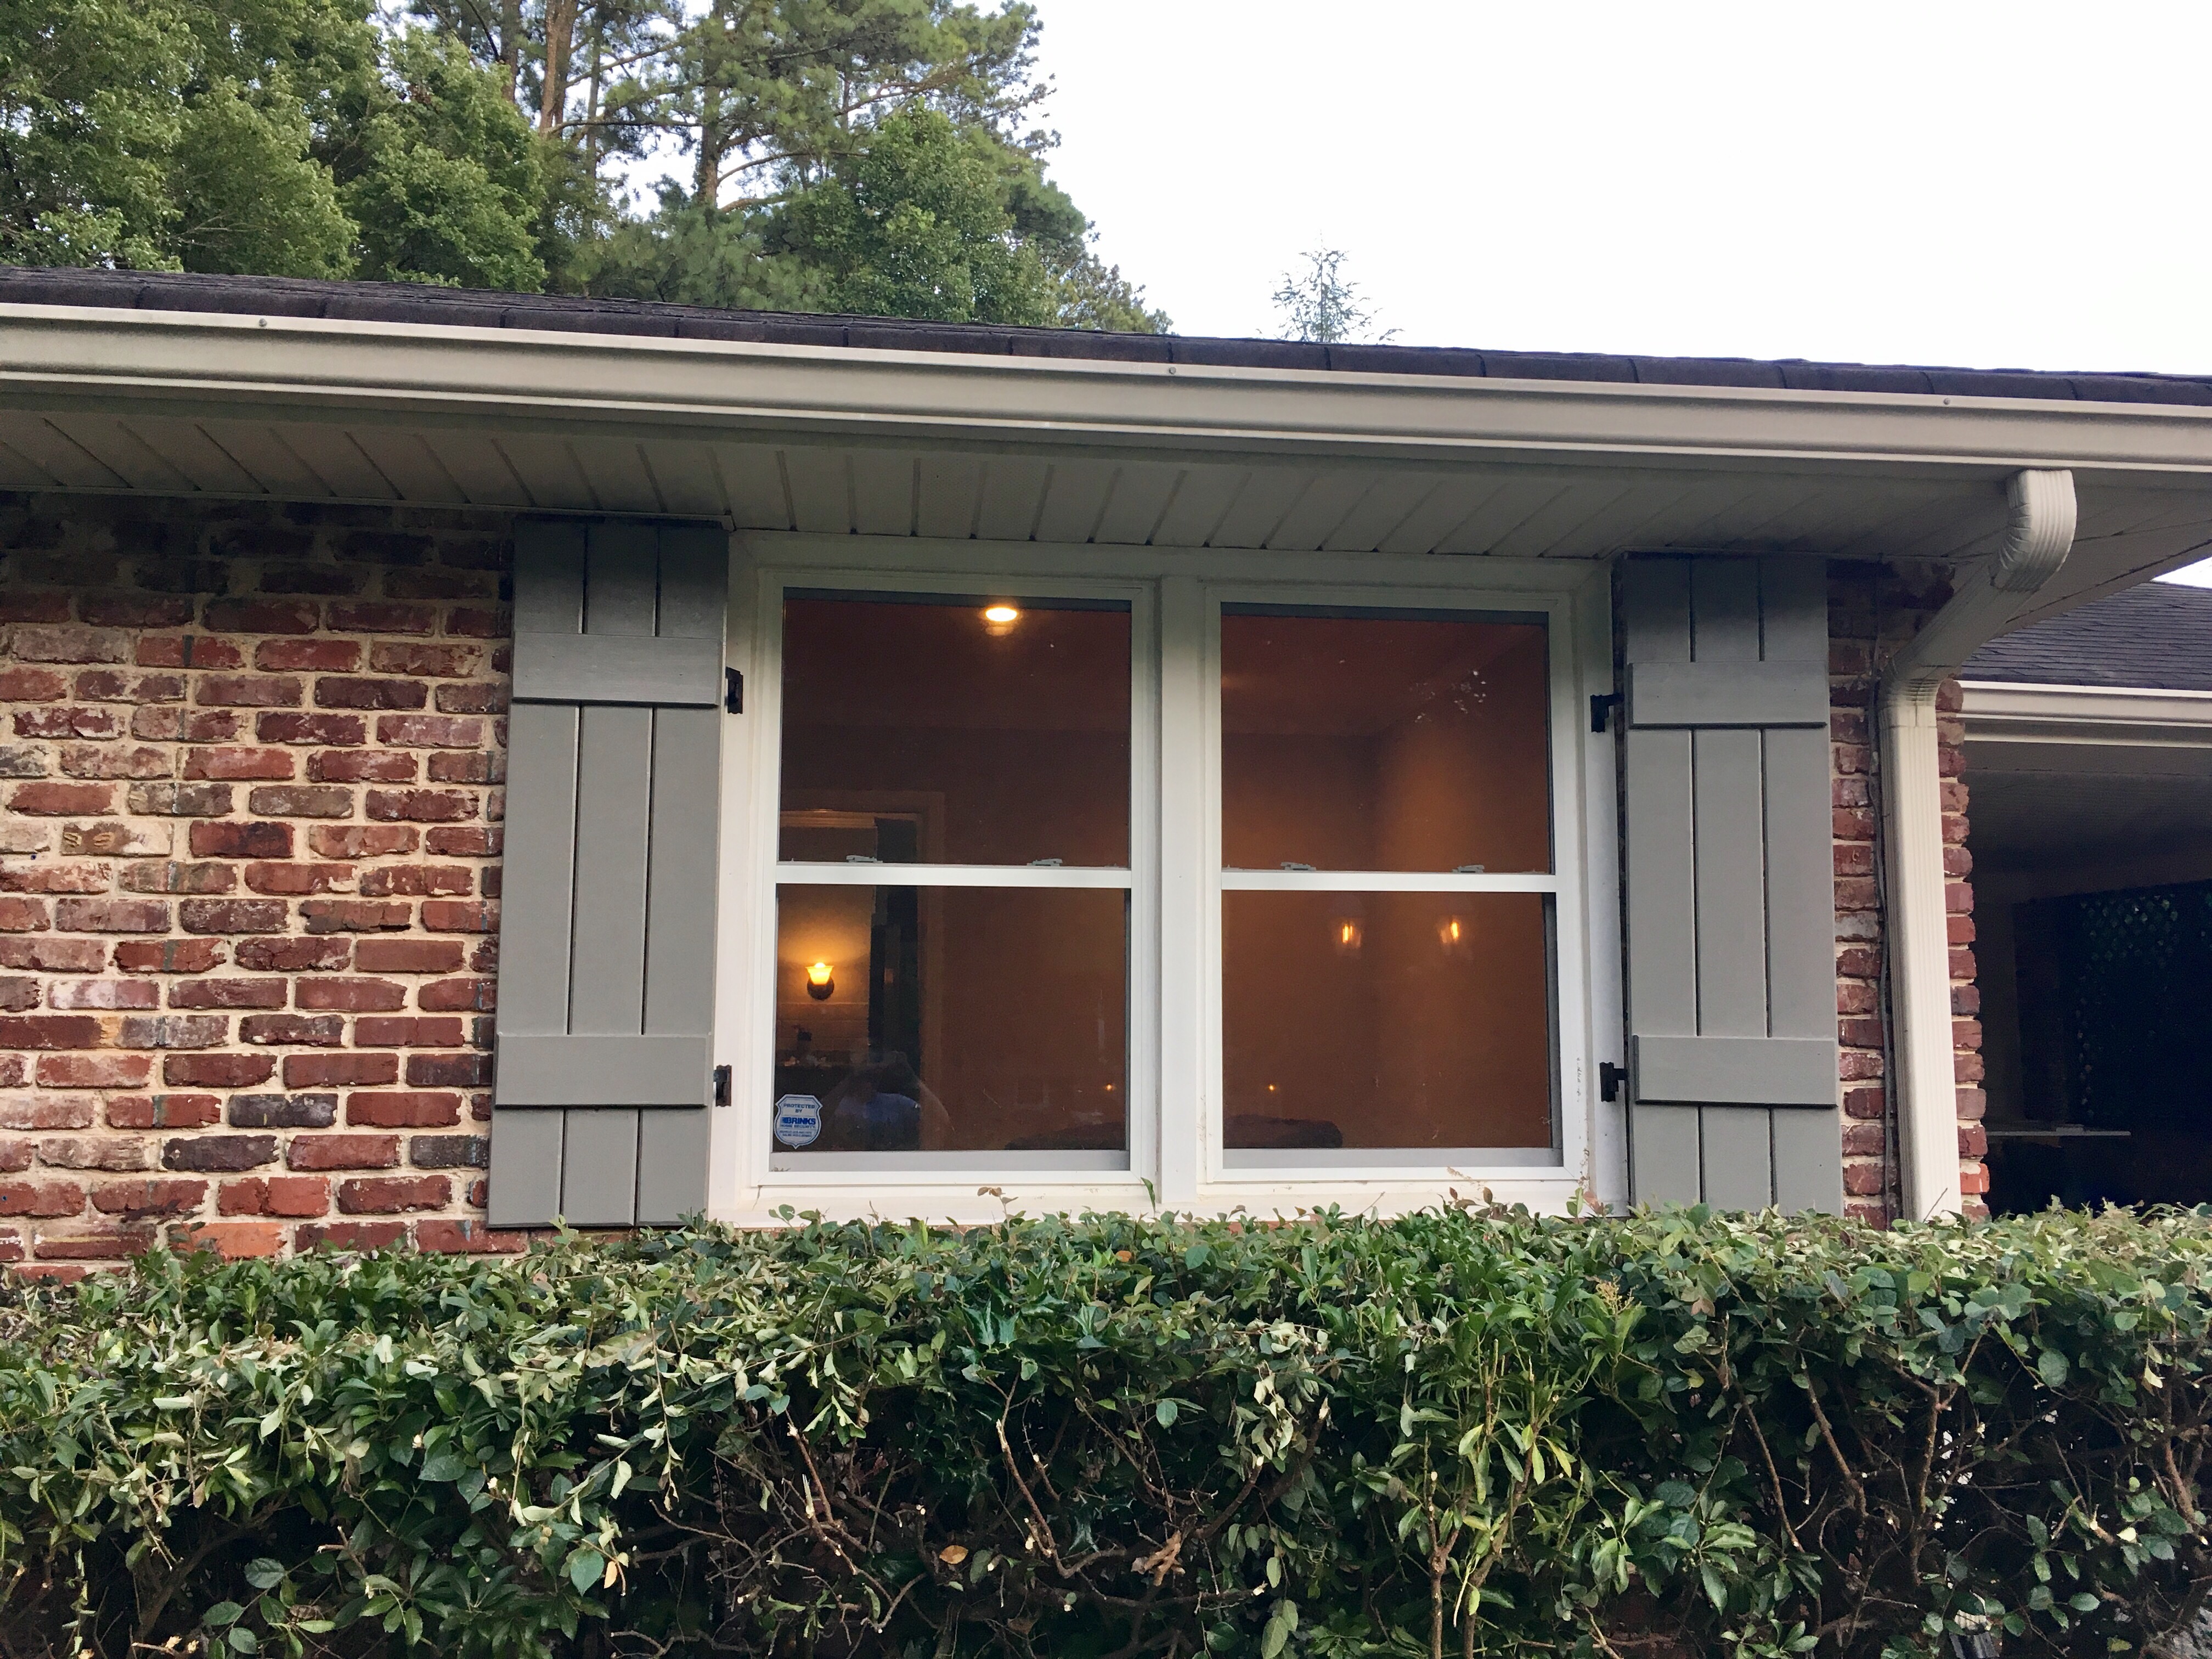 In hindsight, my only regret for the project was I wish I would have numbered them and marked which way was up. This would have made rehanging them a bit easier. Nonetheless, we figured it out with minor complaining from my tall husband.
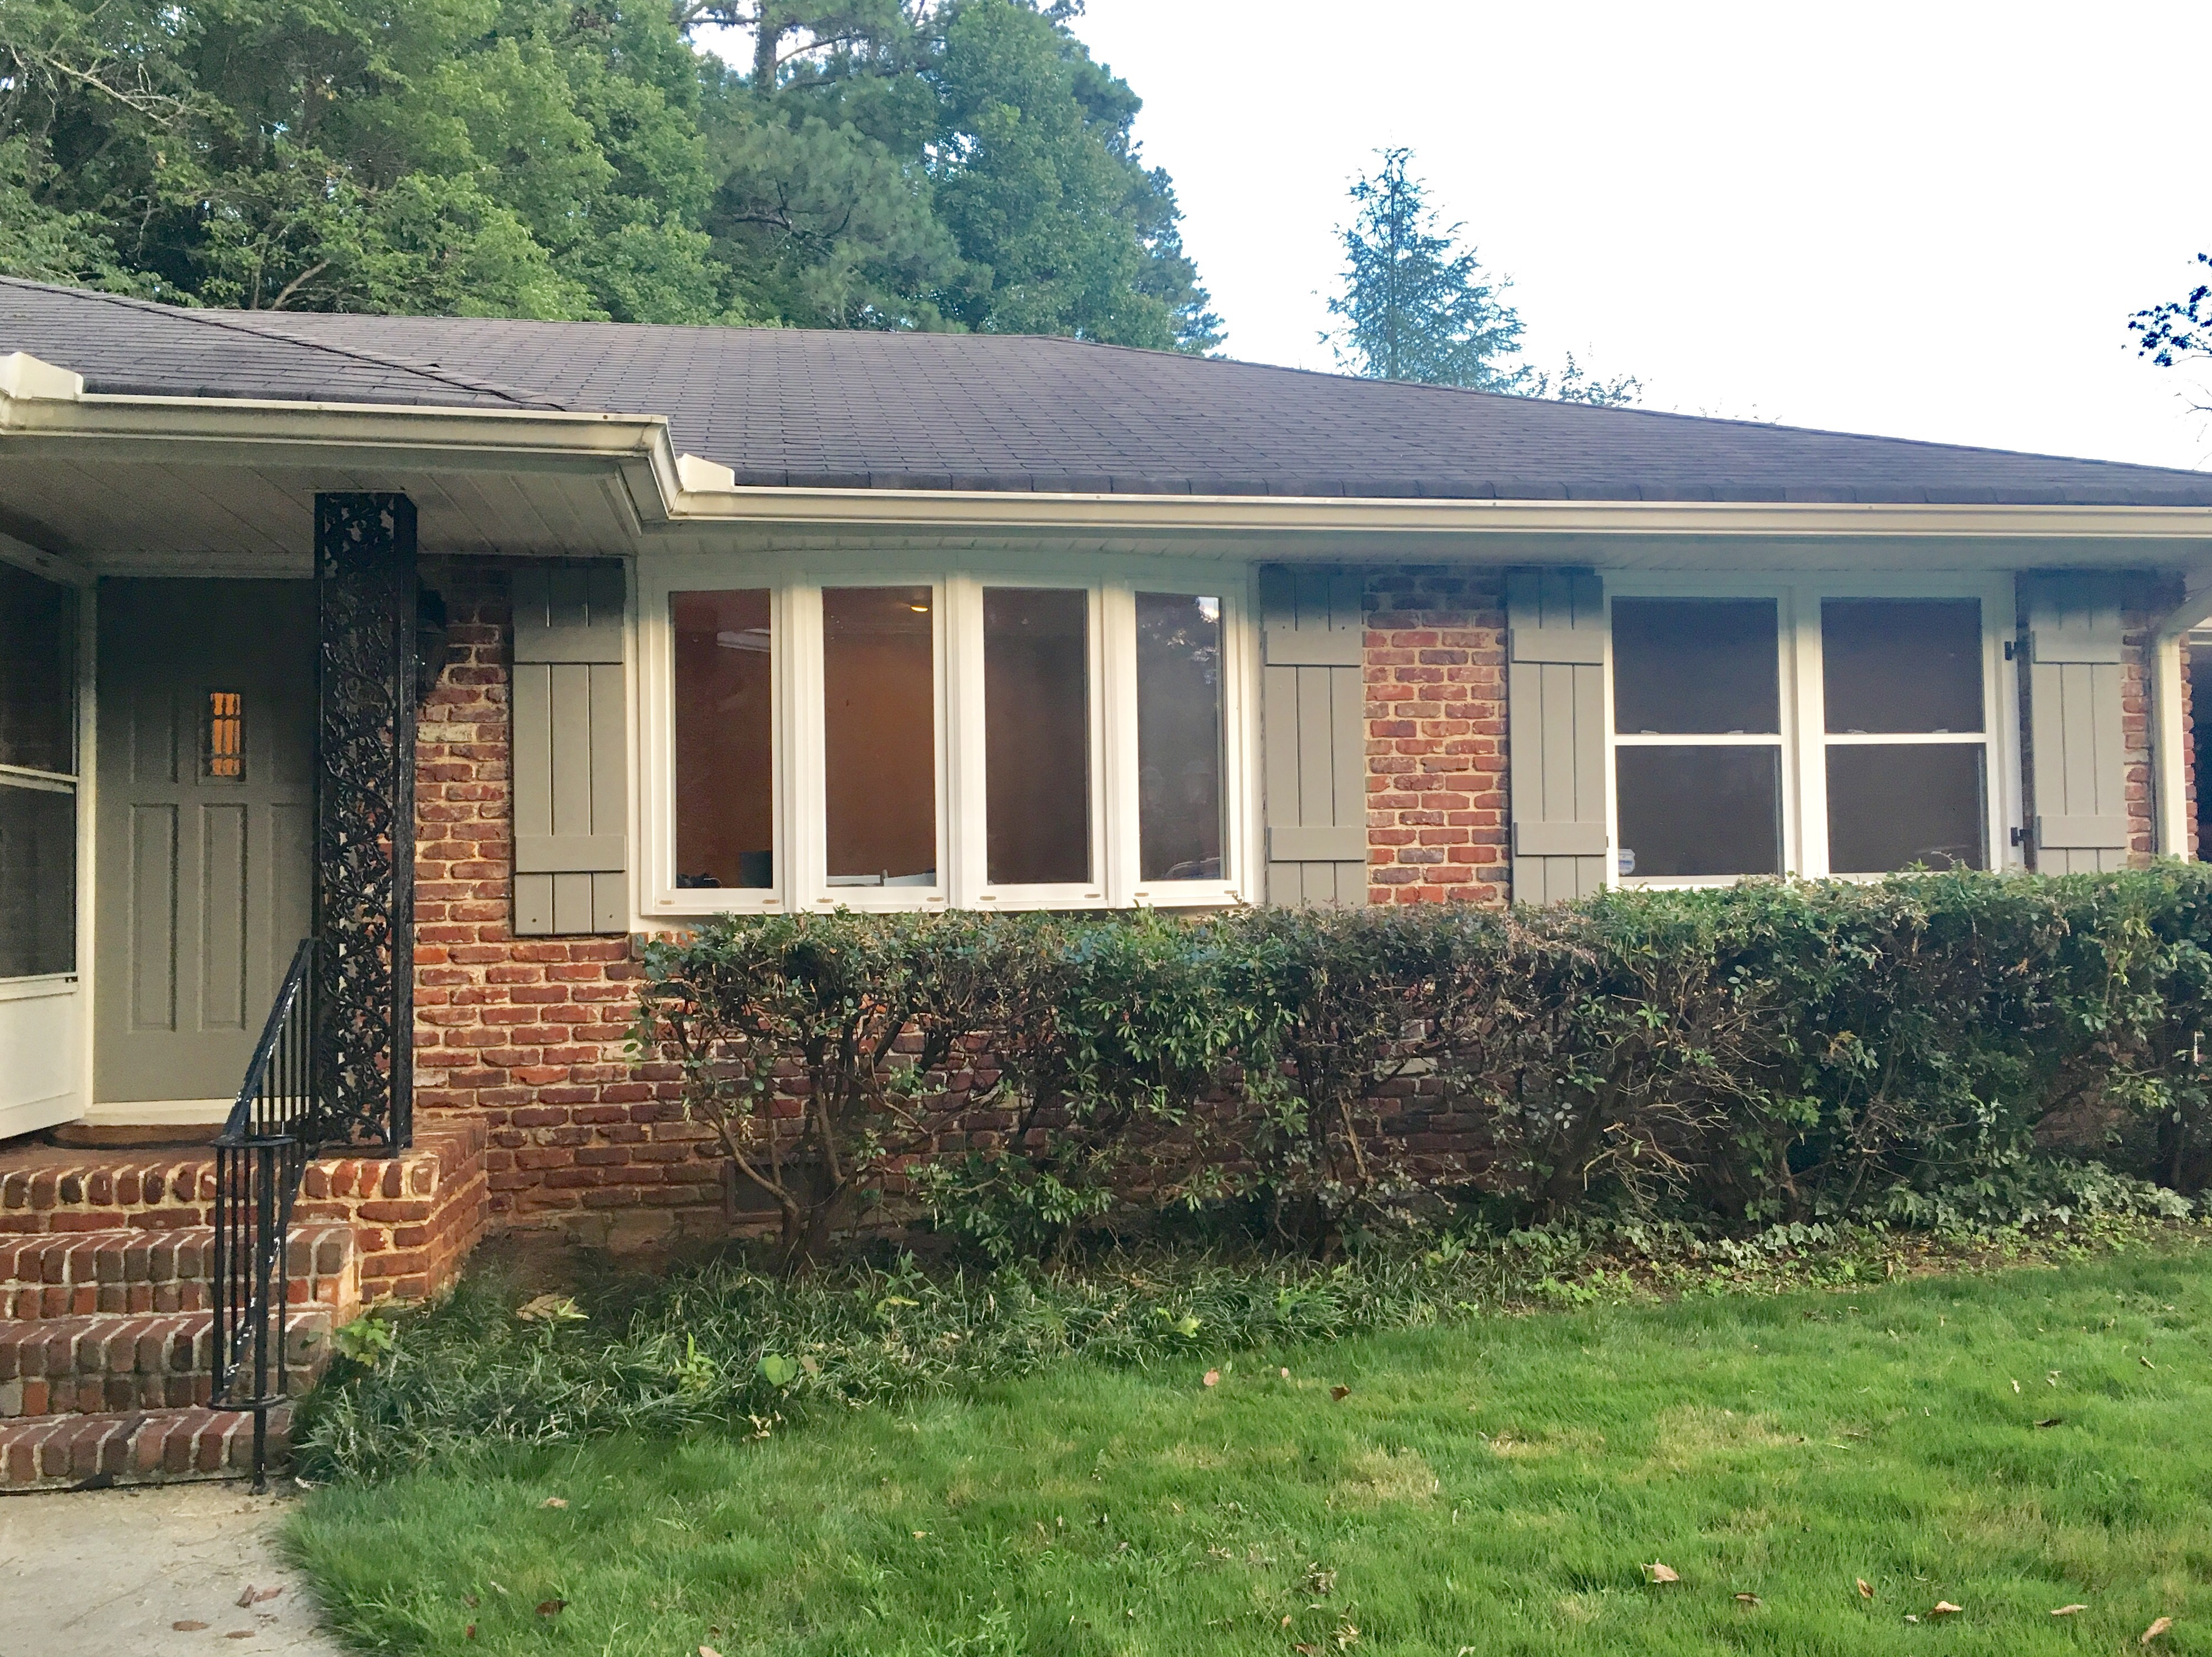
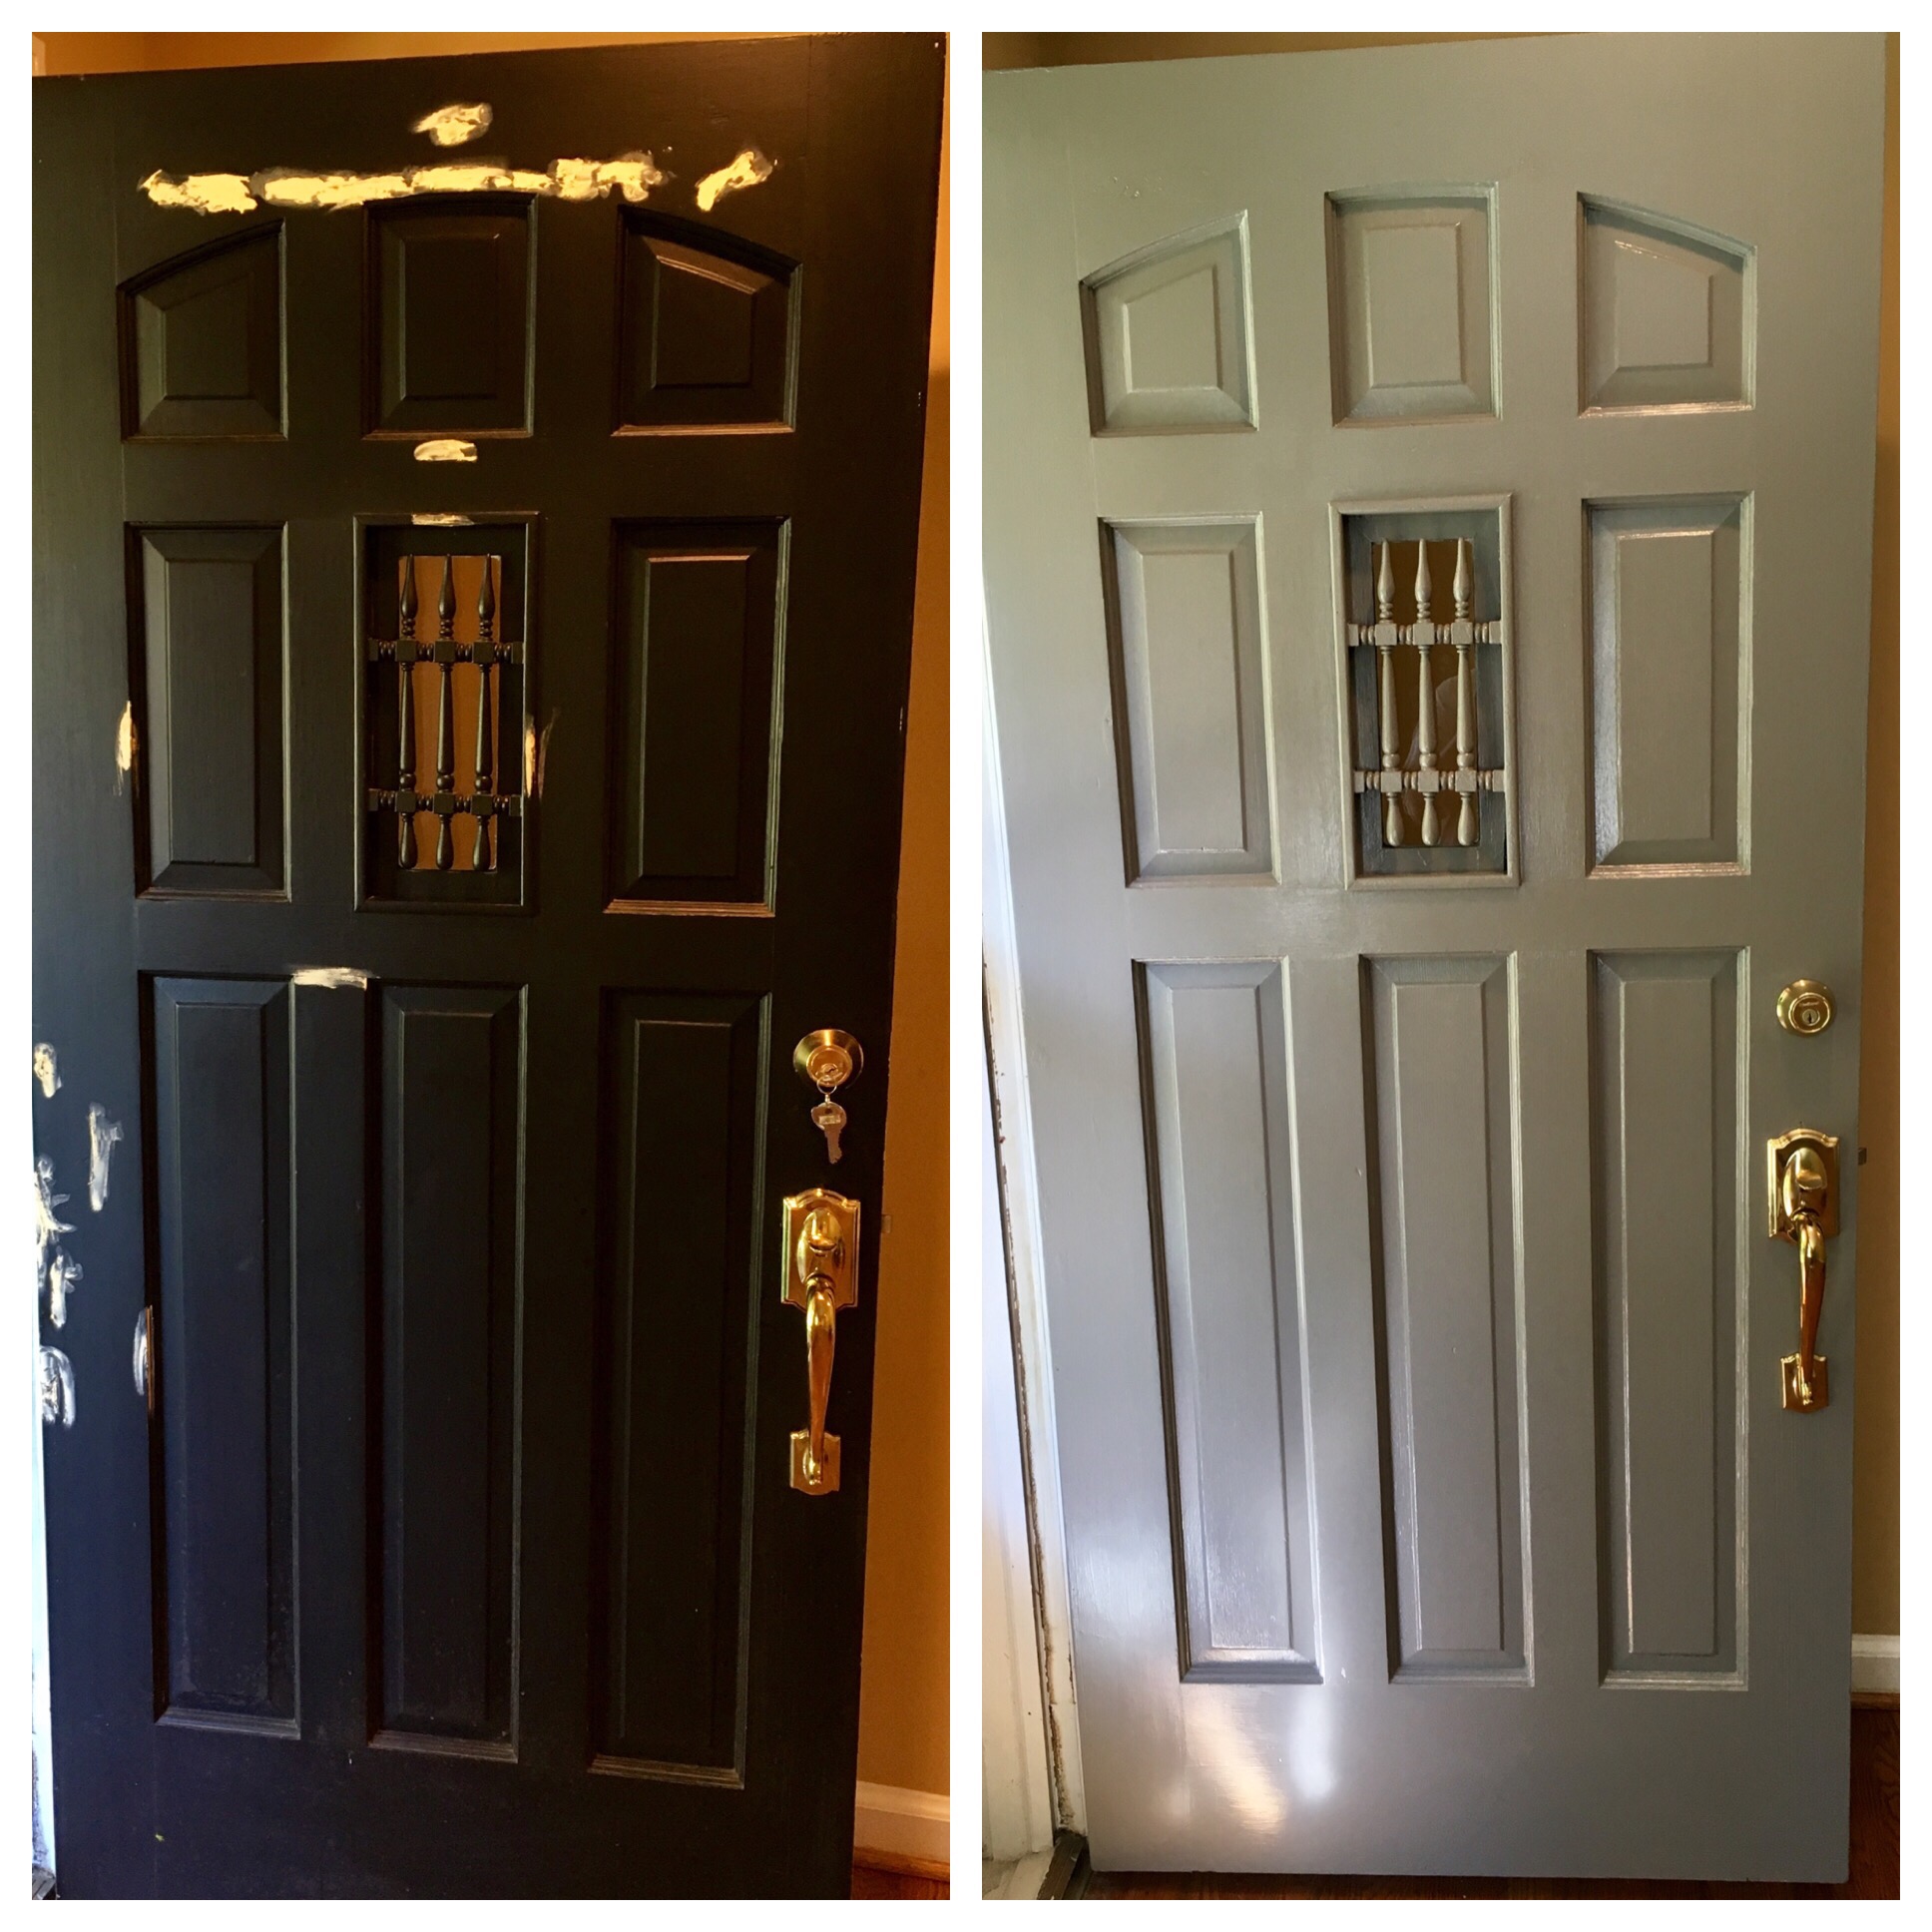
You will notice that I also painted the front door the same color. I mean, I had a whole gallon of paint- so why not? I used wood putty to fill in holes, then sanded, primed and painted it. I like how the door details stand out more prevalently now.
learn, brooke

Your posts are inspiring. Makes me want to paint!!
LikeLiked by 1 person
Thanks! It’s in my genetics 😉
LikeLiked by 1 person